
You can pay your dues online, make changes to your contact information, plus view a Directory and Map online. All you have to do is login to your Member Profile at bnia.ca with your own private username and password. Here’s how to do all this.
Step 1: Login to your BNIA Profile page
Step 2: Renew your membership online
Step 3: Update your contact or property details
Step 4: View the online map and directory
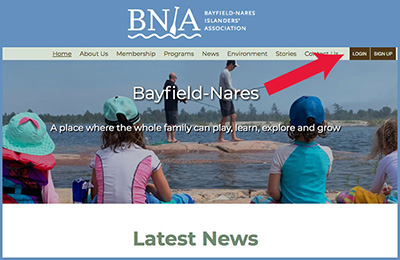
1. You can login to the BNIA website at the top of any page by clicking the brown “Login” button on the menu bar, top right. (The “Sign-up” button is for new members; don’t click that!) This will take you to your member Profile page, your own private portal within our website.
2. If you’ve never logged onto our website before, or if you’ve forgotten your password, then click Request Password (blue button) at the Login pop-up window:
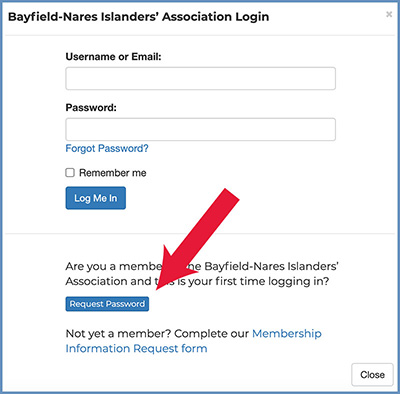
3. Follow the Request Password instructions to receive a password by email. Note: you must use the main email address we use to correspond with you in order to login to our website (the one listed first in the printed Membership Directory).
4. If you have any problems logging in or getting a password for the website, please contact Nichola Martin, Membership Coordinator.
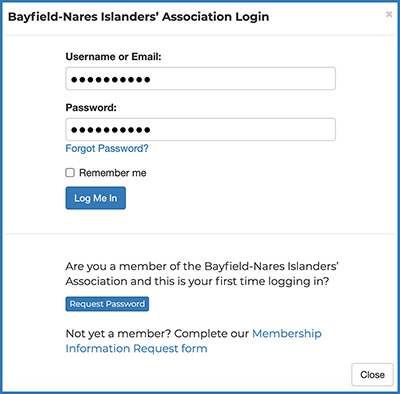
1. Click the brown Login button on any page of our website, top-right on the menu bar if you’re not already logged in. (If you are logged in, the brown button will say “Profile”. Click that and go to sub-step 3 below.)
2. Enter your username and password at the Login pop-up. (If you’ve forgotten or misplaced your password, click the “Request Password” button.)
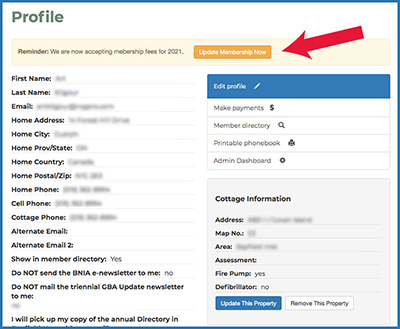
3. At your “Profile” page click Update Membership Now (orange button):
4. At the “Make Payments” page confirm that your membership type is correct (Full or Associate); if it’s not, please contact us.
5. If you’re a full member, you can also pay for any associate members who are linked to your membership by ticking their boxes in the “Associate Members” section. (Or they can login separately and pay their own dues.)
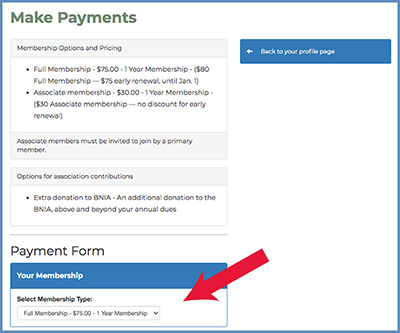
6. Add any Extra donation you wish to make to the BNIA in the Add Contributions section of the page (if you DON’T want to contribute extra, leave that box blank)
7. Click Make Payment (green button)
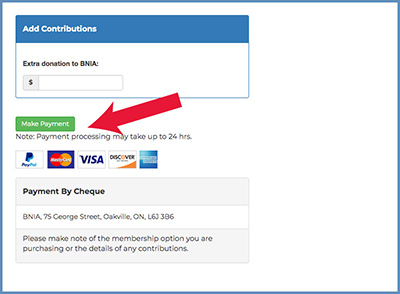
8. At the next screen, choose payment method, either PayPal, or “Pay with a credit or Visa Debit card”.
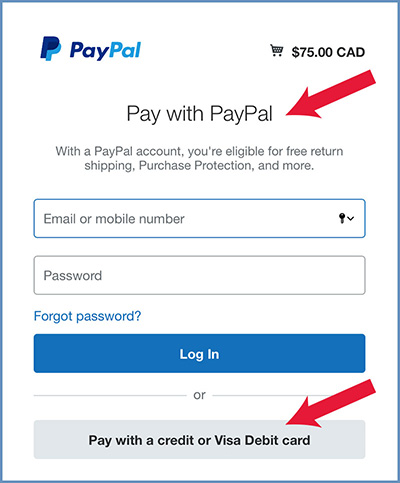
Note: If you already have an account with PayPal (quite separate from the BNIA), you may not see the credit card option above. PayPal is recognizing you (from web browser cookies, or perhaps from your email address) and is steering you in that direction. Our advice is to use that option. It will make your life easier, as long as you know your PayPal login information and have a valid credit card on file with them. If you really want to pay directly with a credit card (without logging into your existing PayPal account) follow these instructions.
9. The credit card option is shown below — submit your payment details. (Note: credit card payments get routed through PayPal to us, but you don’t need a PayPal account in order to do this and there is no extra fee.)
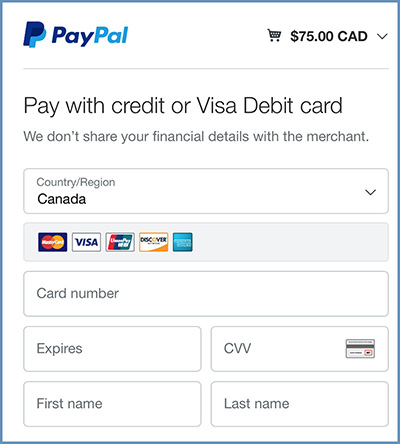
10. Click Pay Now at the bottom of the screen to complete your transaction. You will receive an email receipt from PayPal for your payment. If you paid by credit card, the receipt will say “Create PayPal account now,” but this is entirely optional — you can ignore this request.
Congratulations! You will receive an email confirmation of your payment and/or donation. Thanks very much!
Any questions or problems? Contact Nichola Martin, Membership Chair.
We greatly prefer if you renew your membership online for this reason: it updates our financial records, updates our membership records and processes your payment in one neat step. However, we also accept payment by cheque, through the mail.
Send your cheque for your Full ($80) or Associate ($30) Member dues payable to the BNIA, to: Mike Major, Treasurer, 11 First Street, Toronto, ON, M4M 1W7. Include your property number and your member name along with payment.
To update your contact info (change address, phone, email, etc.) or your property information (Island Name, Description or even to add a photo of your cottage), follow these steps.
1. Login to your BNIA Profile by clicking the brown Login button on the menu bar (you will still be logged in if you just paid your dues). If you’re already logged in, the button will say “Profile”. Click that.
2. At your “Profile” page, click Edit Profile to change your contact information. After making changes, scroll to the bottom of the page and click the blue Update button to save them.

3. Also at the “Profile” page, click Update this Property to change your island name (after your property/island number), upload a cottage photo, provide a cottage description, or confirm if you have a fire pump. Please do NOT change your property number; email us if you think the number is incorrect.
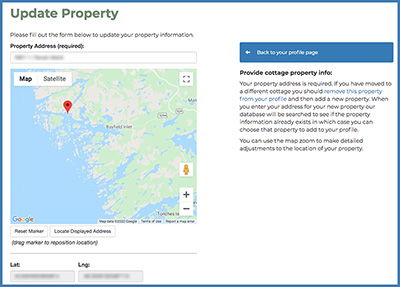
These things all appear in the online “Member Directory”, which all members can access when logged into the website.) After you’re finished, scroll to the bottom of the page and click Update to apply your property changes.
To view an online directory of all members, go to your Profile, click “Member Directory”, then click “Display All” (or you can search for a member name). You can also see all member locations using the online “Map View”. Click on a map pin to reveal who lives there and their contact info. Wow — handy feature for learning who lives where!